Configuring Magmi
EC Internet’s RAPID Web Sync™ works with a custom, configured version of MAGMI. Magmi is a utility that takes mass inventory adds and changes from the RAPID Web Sync extension installed in Magento and creates inventory items, catalogs and attribute data directly in the Magento Database. Magmi has special features like automatically creating or update the catalog menu navigation on the fly as you add or update inventory records.
You will need to install the custom version of MAGMI on your Magento site, and you will need to configure the copy of Magmi included with the RAPID Web Sync. This is done with the Magmi Web Interface, accessible via your-magent-site.com/rapidws/web/magmi.php.
Here you will be presented with a log in prompt. Enter the default Magmi credentials as follows:
Username: magmi
Password: magmi
Next, you will be presented with a number of different settings panels. Under Configure Global Parameters, you will need to enter your Magento web server’s MySQL information.
By default, Magento uses “magento“ as the Database name, and the prefix is left as blank. Your situation may vary depending on how your Magento site was setup. Be sure to double check all parameters before saving or continuing. Be sure to also enter the Filesystem Path to the magento root directory inside of the Magmi config.
Finally, enter your username and password for the MySQL server used by your Magento installation. When done, your screen should resemble:
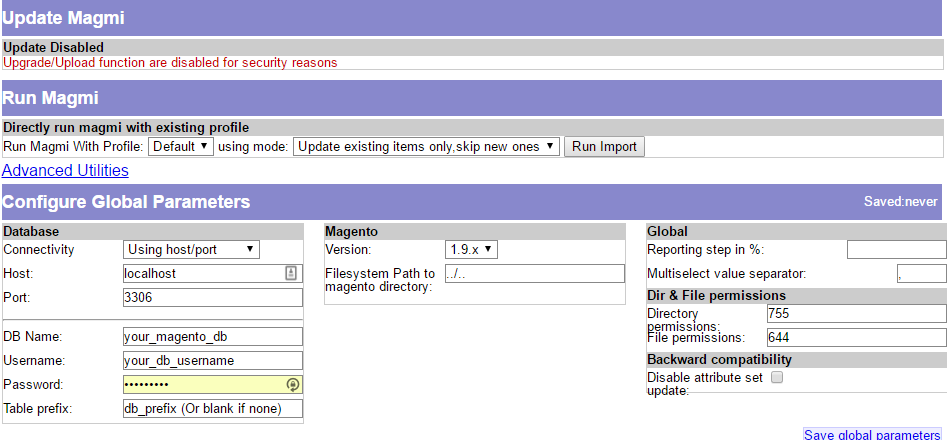
Click Save global parameters. Your Magmi installation is now complete! It is important to note that should you ever need to revisit this screen, you will need to enter the username and password for your Magento admin panel, and not the default magmi credentials mentioned earlier.
![]()